برد توسعه ESP32 دارای بلوتوث، وای فای داخلی و مبدل CP2102
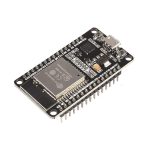
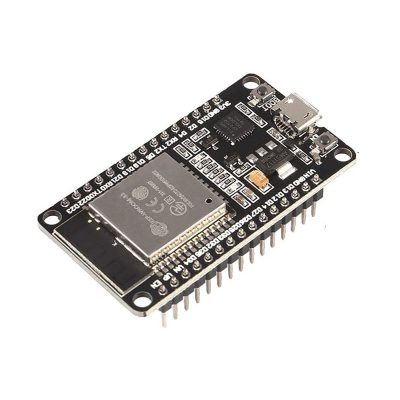
HW-463 ESP32-WROOM-32 Dev Board
Description
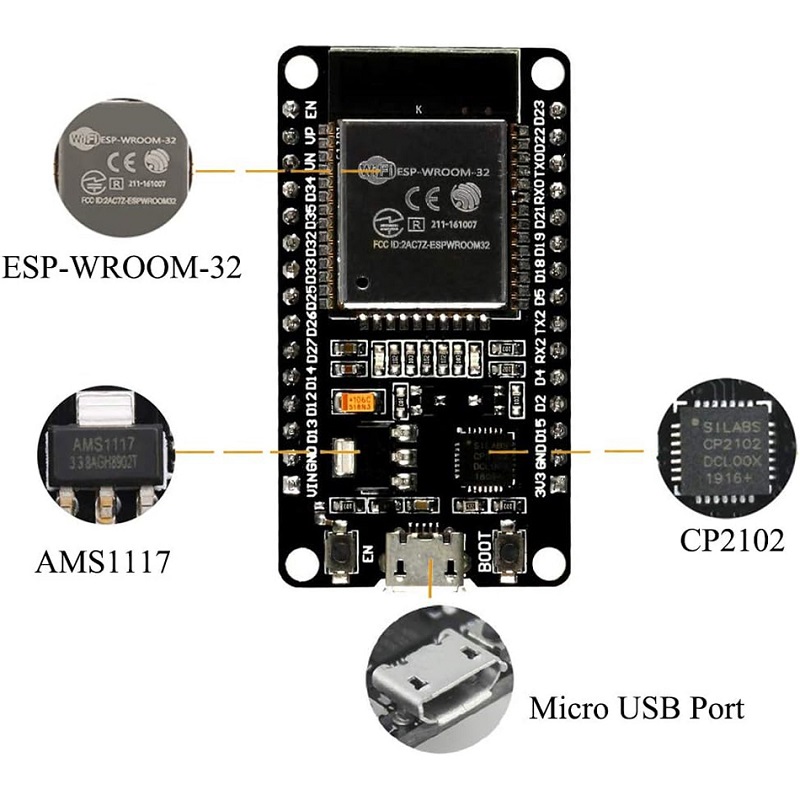
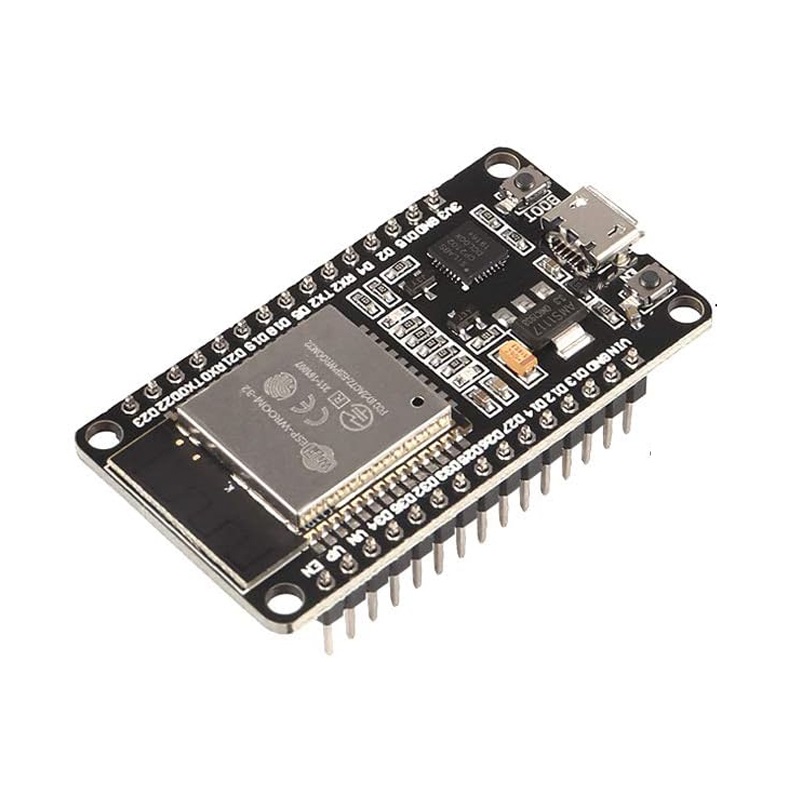
The ESP32-WROOM-32 Development Board is basically a development/breakout board for Espressif’s ESP32-WROOM-32 series chip.
It features both WiFi and Bluetooth connectivity, has 4MB of flash and 512kB of SRAM which can be used to store custom code, along with many more features which you can read about below.
Programming one of these is very simple and can be done via the micro-USB connector which makes use of the on-board CP2102 USB to UART chip.
These boards are manufactured in China and come in a few different flavours.
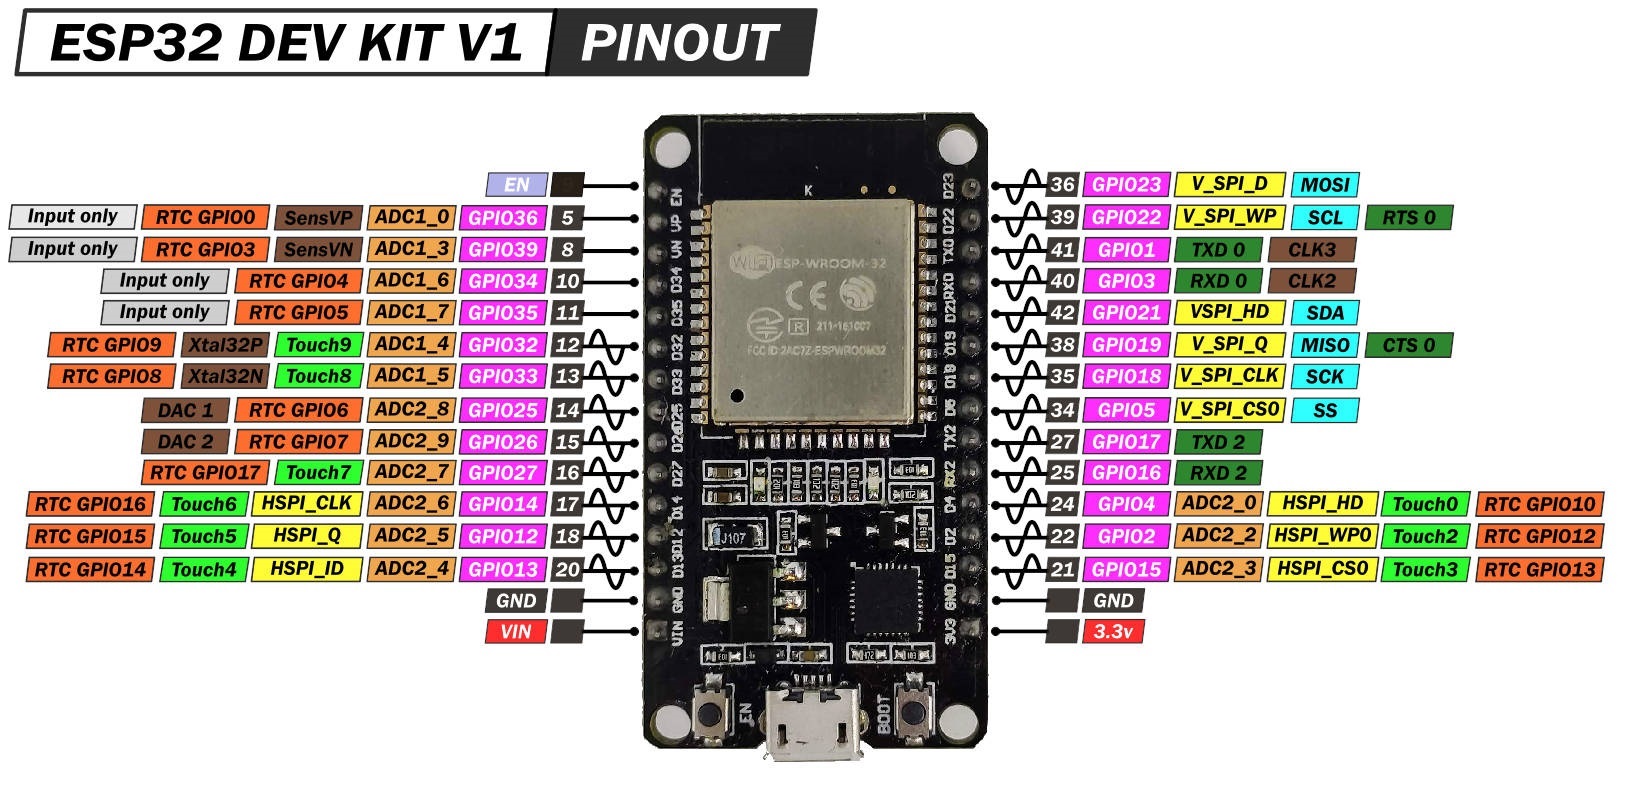
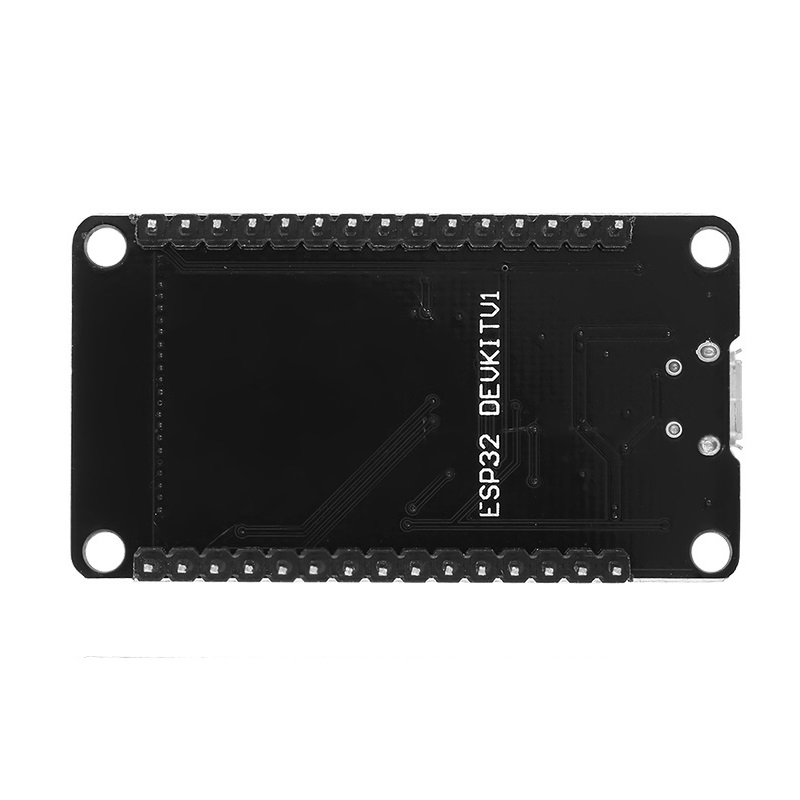
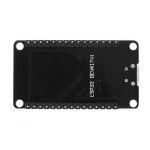
This dev board follows the pinout and general layout of the “ESP32 DEVKITV1” model which is usually printed on the underside of the PCB.
Features / Specs
Board Model: ESP32 DEVKITV1
Main Module: Espressif ESP32-WROOM-32 (ESP32-D0WDQ6) (80 – 240MHz, Dual-Core, 32-Bit LX6 Microprocessor)
External Flash Memory: QSPI 32-Mbit (4-MB)
SRAM: 520kB
USB to UART Interface IC: Silicon Labs CP2102
USB Connector Type: Micro-USB
Supply Voltage: 3.3 – 5.0 VDC
On-Board Regulator: AMS1117 (Fixed 3.3V Version)
ESP Module Operating Voltage: 3.3VDC
Operating Temperature: -40 to +85°C
Number Of Pins: 30
Pin Pitch: 2.54mm
Spacing Between Pin Rows (Pin Centre to Centre): ~25.4mm (Breadboard Compatible)
Board Dimensions (Including Pin Headers): ~ (51.5mm x 28.6mm x 13mm)
Mounting Hole Diameter: ~3mm
Mounting Hole Spacing (Centre to Centre): Long Side: ~46.5mm / Short Side: ~23.4mm
WiFi Protocols: 802.11 b/g/n (802.11n up to 150 Mbps)
Frequency Range: 2.4GHz ~ 2.5GHz
Wireless Network Modes: Station / SoftAP / SoftAP + Station
Hardware Features: UART / QSPI / I2C / I2S / SDIO / PWM / ADC / DAC / Capacitive Touch Sensor / Hall Sensor / Temperature Sensor / GPIO
Network Protocols: IPv4 / IPv6 / SSL / TCP / UDP / HTTP / FTP / MQTT
WiFi Security Modes: WPA / WPA2 / WPA2-Enterprise / WPS
Bluetooth Protocols: Bluetooth v4.2 BR/EDR and BLE specification
Application
1. Universal low power IoT sensor hub.
2. Home automation.
3. Universal low power IoT recorder.
4. Mesh network.
5. Video streaming of the camera.
6. Industrial wireless control.
7. OTT TV box / set-top box device.
8. Baby monitor.
9. Smart Socket.
10. Sensor networks.
11. Wi-Fi toys: Counters, toys, Anti-lost device.
12. Wearable electronic products.
13. Wi-Fi speech recognition device.
14. Wi-Fi location-aware devices.
Resources
Original Dev Kit Resource Page
Espressif ESP32-WROOM-32 Datasheet
ESP32 Series Datasheet
Silicon Labs CP210x USB to UART Bridge VCP Drivers
how to use
To start using this board and program it from the PC or Laptop you must install its driver, for this case the board incorporates the CP2102 chip which is responsible for programming and establishing USB-Serial communication.
In the following link you can download the CP210x universal controller which incorporates the CP2102 version that the board needs
CP210x Universal Controller
Note: Install the driver according to the operating system of your PC or Laptop.
In case you have installed previously do not install the driver.
Once the driver is installed you can connect the board to your PC.
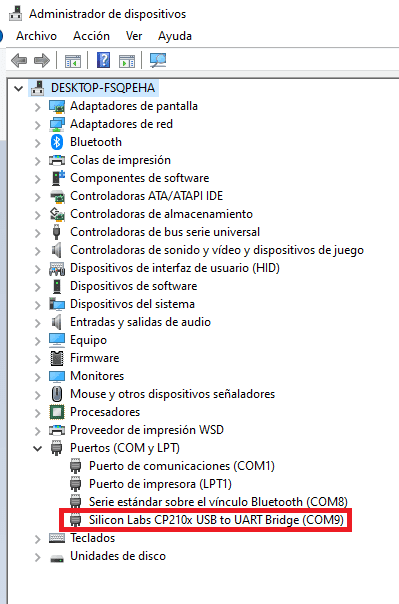
To verify that the driver has been installed correctly and assigned a COM port to the board, follow these steps:
Open “Device Manager”
Connect the board to the PC
Click on Ports (COM, LPT)
You should recognize the plate as shown in the following image
How to program ESP32 DEVKIT V1?
Once the controller is installed you can program it in different programming environments you can choose
Arduino IDE (in C++ language)
Esp-idf (Espressif IoT Development Framework) developed by the chip manufacturer
Simba Embedded Programming Platform (in Python language)
MicroPython
Javascript (Espruino, Duktape, Mongoose JS)
And others…
It is widely used with the Arduino IDE since it has a wide variety of examples, information, and other resources that will help you start using this board.
To use with Arduino IDE you must perform the following steps:
Open Arduino IDE.
If you have not installed it, download it directly from the Arduino page , install the executable version, do not install the portable version.
Copy the following URL: https://dl.espressif.com/dl/package_esp32_index.json
Go to the Arduino tab called “File”.
Click on “Preferences”.
Go to the Card Additional URLs Manager:
In the box paste the URL. If there is another URL, put a comma at the end, give a space and paste the URL.
Click on Ok.
Go to the Arduino tab called “Tools”
Click on “Plate:” and then on “Card Manager…”
A window will appear, look for the plates “esp32 by Espressif Systems” and install them.
To check the installation of the ESP32 cards in the Arduino IDE and upload codes to the board, do the following:
Go to the Arduino tab called “Tools”
Click on “Plate:”
Select ESP32 Arduino and look for the board “DOIT ESP32 DEVKIT V1”
You can also choose the boards: NodeMCU-32S , Adafruit ESP32 Feather or ESP32 Dev Module
Then connect the board to the PC.
Go back to “Tools” and select the “COM” port that the PC assigned to the board.
To check that everything went well, I recommend you do the “Hello world on ESP32” which consists of ordering a Blink code, which only turns an esp32 led on and off.
Perform Hello World on ESP32, with ESP32 38-pin board
To do this, you must take into account that the board does not incorporate a test led as the 30-pin ESP32 does.
For this case you must connect a led and a resistor (220Ω or 330Ω) externally to the esp32, you can use a breadboard.
The following image shows how to connect the led
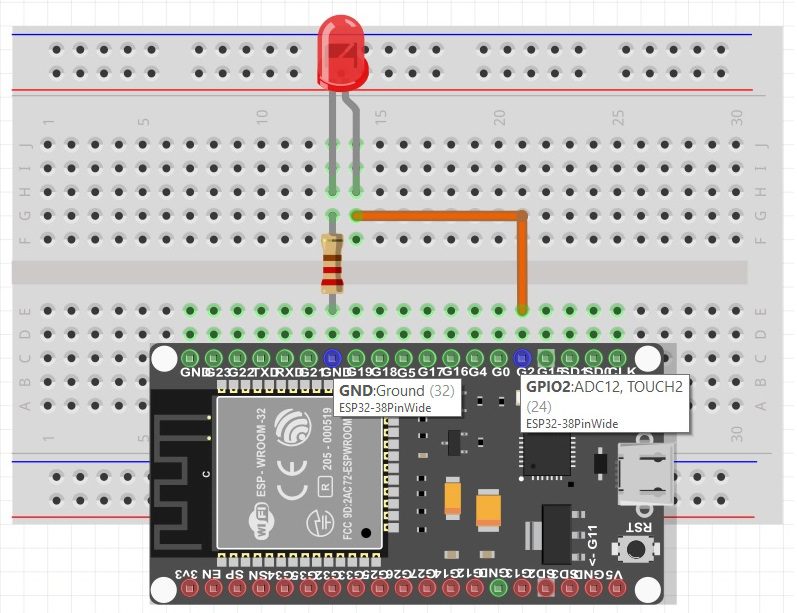
Once the led is connected, load the following code to the ESP32
void setup () {
// initialize digital pin 2 as output
pinMode (2, OUTPUT );
}
void loop () {
digitalWrite (2, HIGH ); // Turn on the LED
delay (1000); // Wait a second
digitalWrite (2, LOW ); // Turn off the LED
delay (1000); // Wait a second
}
Note:
If the program does not load directly to the board, you will have to put the board in programming mode before uploading the code.
To put it in programming mode, do the following:
Press the “BOOT” button when the code is being uploaded Since the loading process begins, stop pressing the BOOT button, you will have to do this process every time you upload a new sketch to the ESP32.



دیدگاهها
هیچ دیدگاهی برای این محصول نوشته نشده است.