برد آردوینو ATTINY85
۱۹۵,۰۰۰ تومان
موجود در انبار
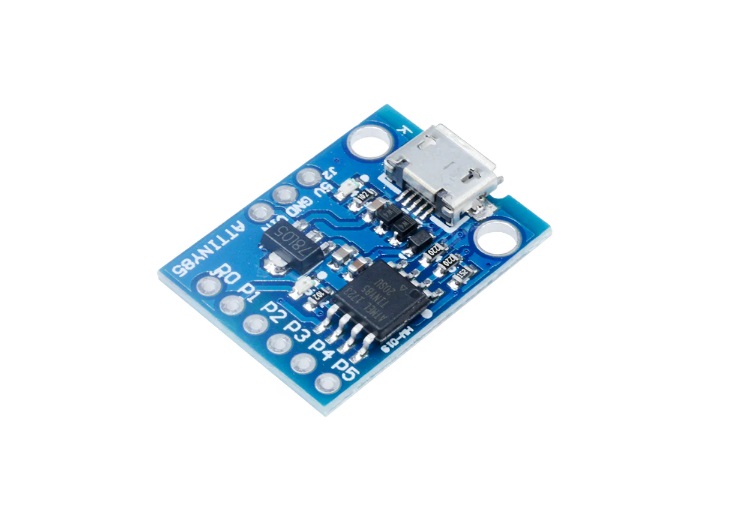
What is the ATTINY85 development board ?
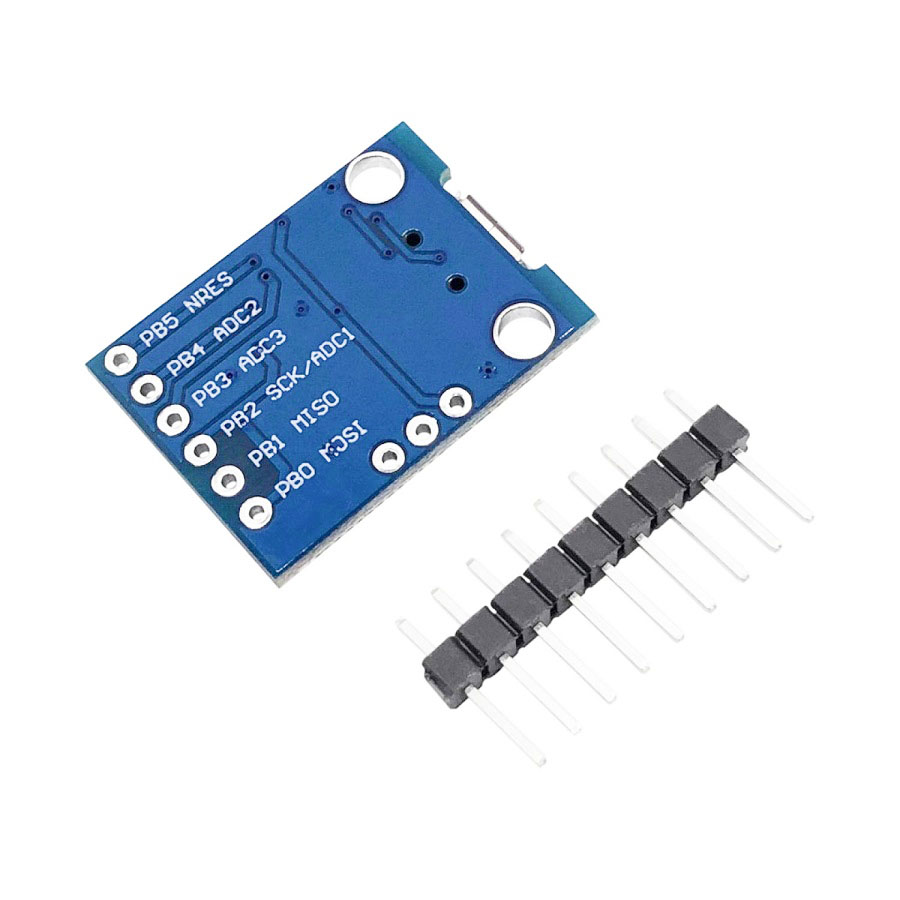
The ATTINY85 development board is based on Atmel’s high-performance, low-power RISC AVR 8-bit combined 8KB ISP flash memory, compatible with the Arduino IDE environment. The device has 2 power ways (by MicroUSB or Pins) between 5V to 7.35V.
SPECIFICATION AND FEATURES
Base device: ATTINY85
Working voltage: 5V to 7.35V. (via USB/Pins)
SRAM: 32KB to 256KB
EEPROM: 512 bytes
Programmable memory in the system: 8K Byte
Communication: SPI/TWI, I2C
A/D: 4 Channels at 10 bits
I/O: 6 Pins
Timers: 2 8-bit
Dimensions: 17.8mm x 24.2mm x 4.1mm (without header)
Working temperature: -40°C to 85°C
Operating frequency: 20 MHz
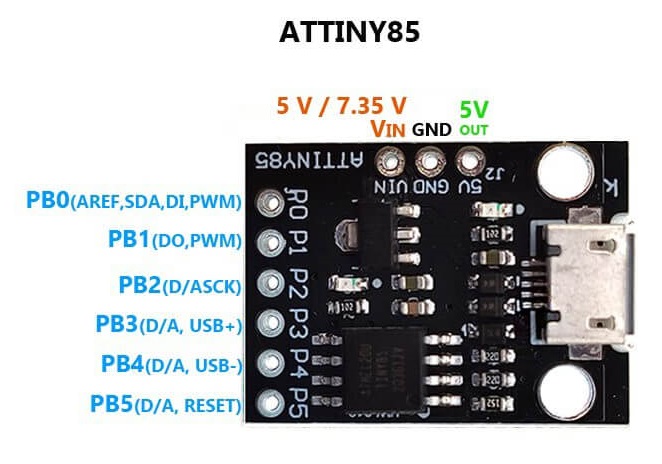
Pins
P0 → PB0 AREF, SDA,DI,PWM
P1→PB1: DO,PWM
P2 →PB2: D/A, SCK
P3 →PB3: D/A, USB+
P4 →PB4: D/A, USB-
P5 →PB5: D/O, RESET
VIN: working voltage
GND
5V out
Programming in the Arduino IDE
You will require the following drivers to be able to use the ATtiny85 development board
Installation of Digispark ATtiny85 drivers.
Installation of Software Arduino IDE.
When we have downloaded it (Installation of Digispark ATtiny85 drivers) we unzip the file in a new folder.
First we will have to install the drivers of the card, for this, before connecting the card, we will enter the folder that has been created for us when we unzip and we will execute the file InstallDriver.exe
Surely we will get a security warning that we will accept and in the case of systems based on Windows 8 we will have to deactivate the driver installation verification without a signature, in my case having Windows 7 I have not had that problem.
Now we will connect the Digispark board to the USB and the drive will be installed.
To use our Digispark board, we need to work with an Arduino IDE version 1.6.6 or higher.
Then we will proceed to configure in the Arduino IDE suite as indicated below:
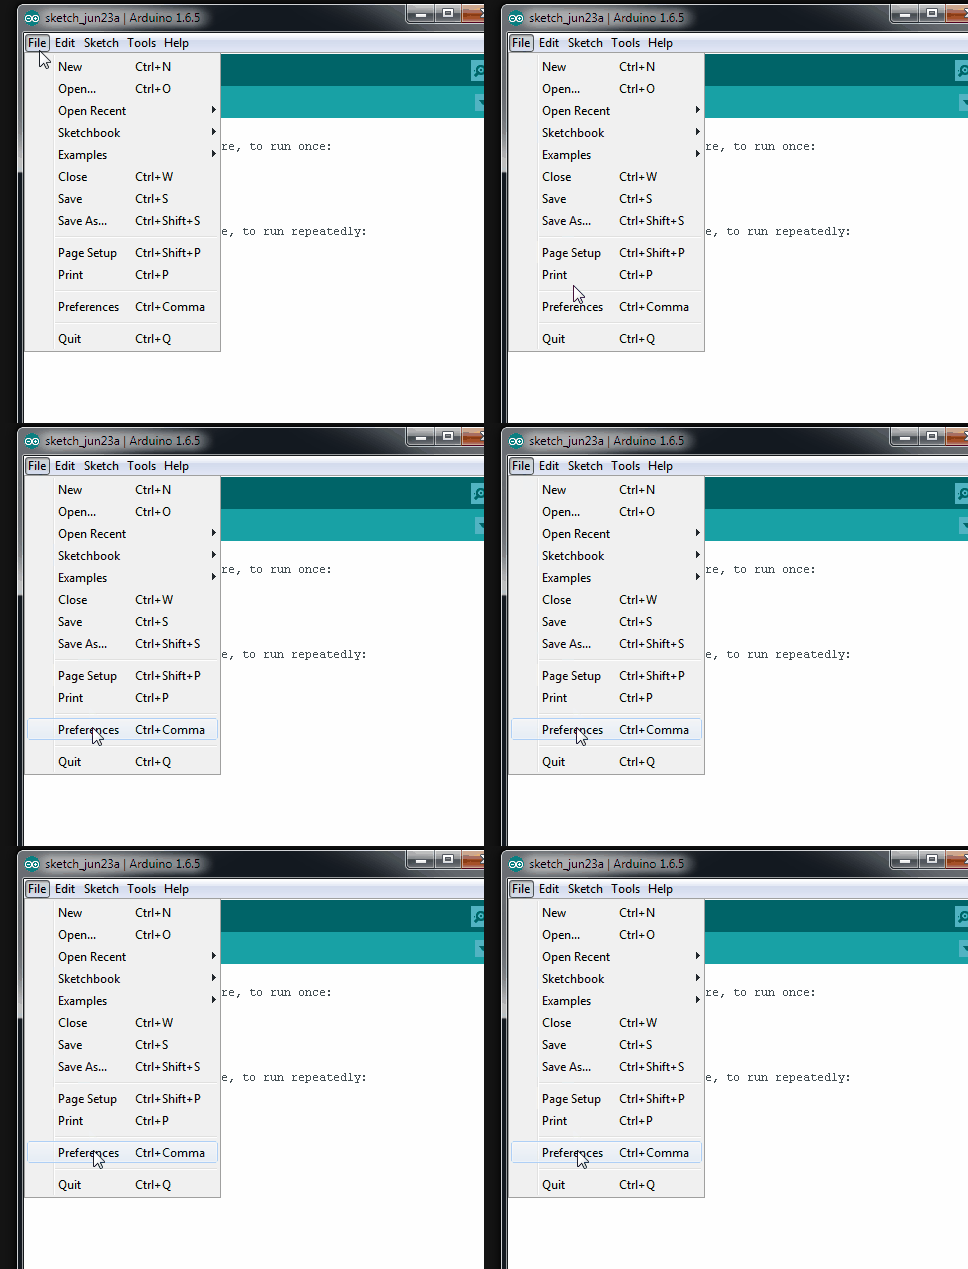
We select “Files/preferences” in the Arduino IDE.
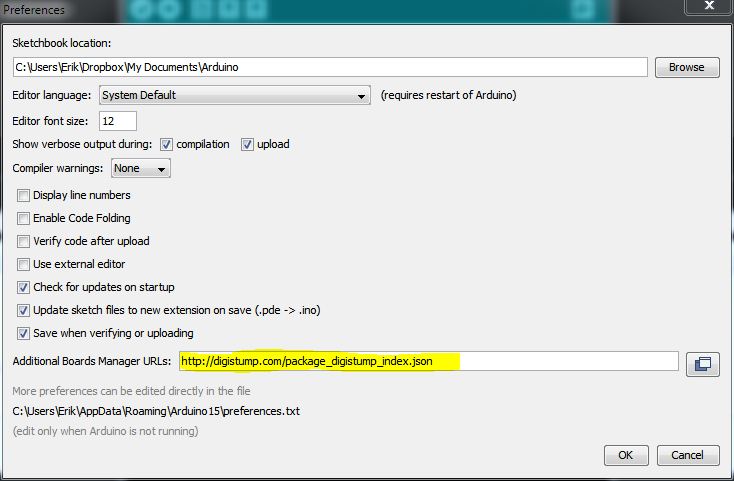
We find the field “Additional card URLs manager” .
Paste the following URL into the field (we’ll use a comma if there’s any other URL listed):
http://digistump.com/package_digistump_index.json
Click OK to save.
We select “Tools / Board / Card Manager” and type Digistump AVR Boards in the search field.
Then we click on Digistump AVR Boards by Digistump and select install.
Once the installation is complete, select Close.
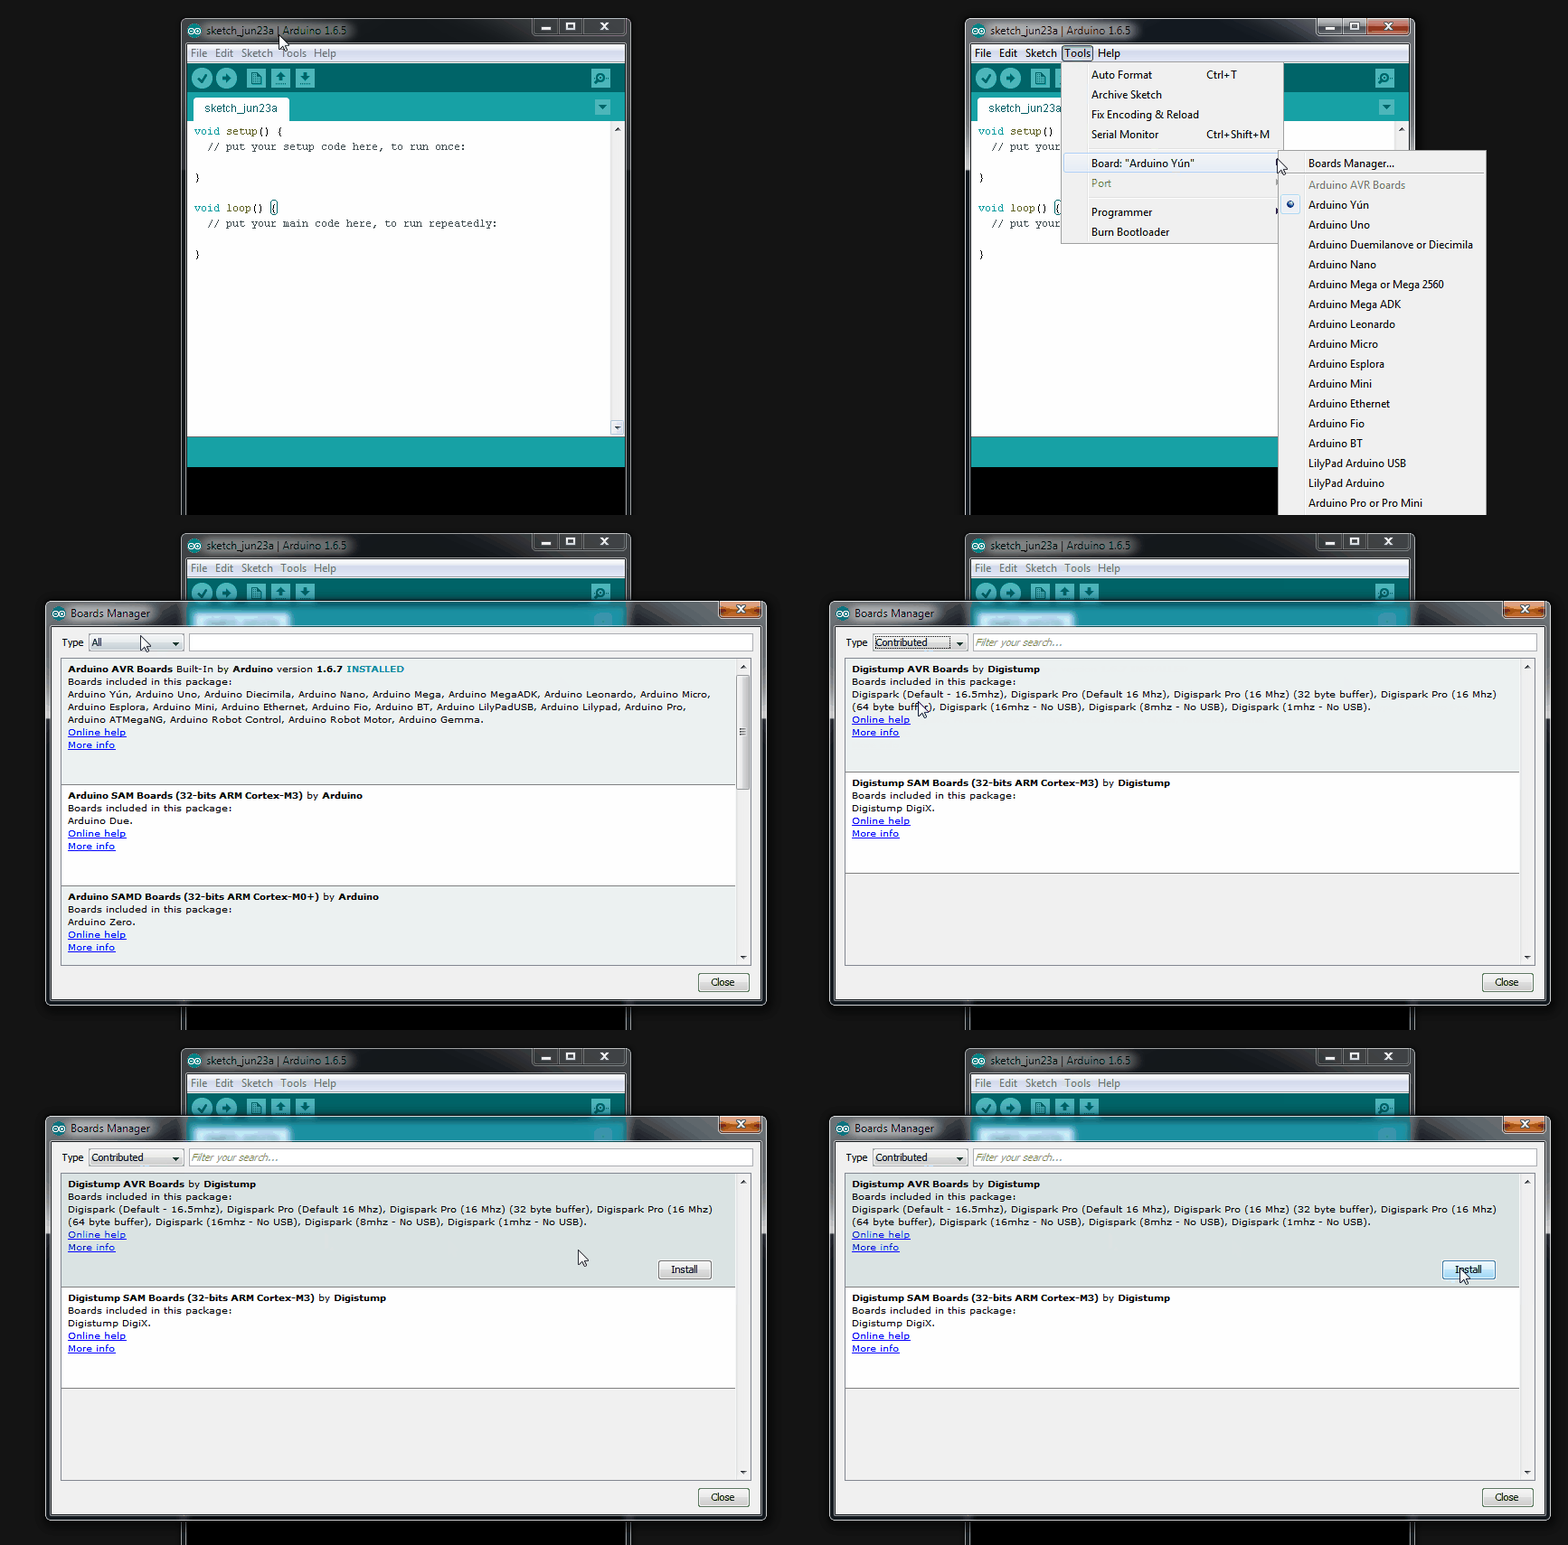
Go back to the menu Tools -> Board and select the board “Digistump (Default – 16.5MHz)
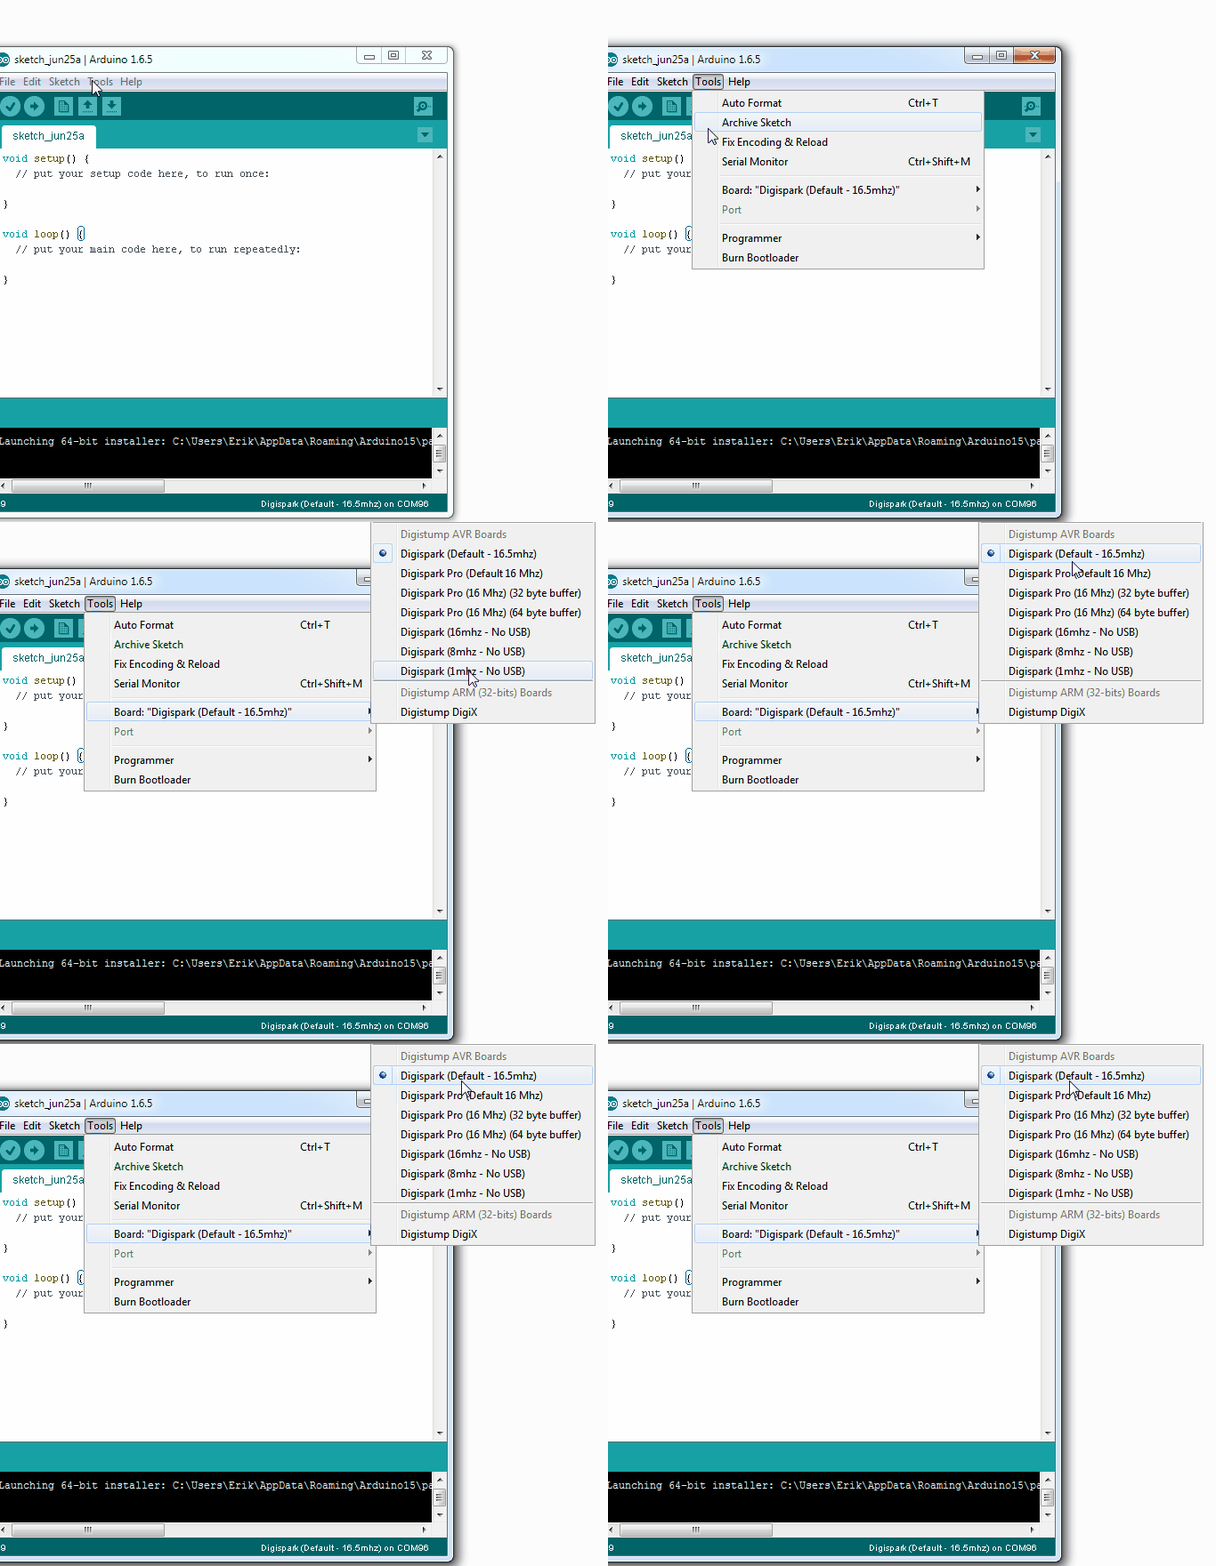
Now you can start programming on the ATtiny85 development board!!







دیدگاهها
هیچ دیدگاهی برای این محصول نوشته نشده است.